Remote Desktop Services can be extremely useful, allowing users to access a terminal server or their company desktop computer from another location. One very common complaint with RDP sessions is screen refresh delays and a delay when typing or trying to click on items using the mouse cursor. It will appear to most that the session has become unresponsive for a period of 5-20 seconds, after this delay the session will return to normal for a period of several minutes before once again becoming unresponsive. You may find that this issue becomes more apparent as more users connect to the specific terminal server in question and if all these users utilise several applications (i.e. Outlook, Word and Excel) together.
Causes for poor user experience when connected via RDP are varied but one of the most common is resource exhaustion or contention. This in turn causes a delay in processing that appears as a pause or unresponsiveness.
Check that your computer or terminal server has sufficient Memory to cope with the current load.
The next thing to verify by using performance monitor is that the PhysicalDisk\% Idle Time is consistently high, that’s correct this should be 90-100% when the server is not very busy.
It is worth running performance monitor using the PhysicalDisk\% Idle Time counter whilst you are seeing the slowdowns, this will help identify if your hard disk or controller are causing contention and in turn the pausing or unresponsiveness.
If you do find that the “%Idle Time” keeps going very low then it’s time to consider some of the options below to help resolve the issue
- Install a second drive or mirror set, move the Windows Page File to this second disk/array to reduce the load on the drive/array holding your operating system
- Install additional memory into the computer or server, this will reduce paging to disk and will generally improve overall system performance
- Migrate to or upgrade your existing RAID controller to a unit that had a Battery Backed Cache (Fast) or Flash Backed Cache (Newer – Faster) to significantly improve performance and alleviate the system
- Migrate to faster hard disk drives, 7200, 10,000 or 15,000 RPM drives are amongst the fastest. The SATA interface is slower than the SAS interface but is cheaper. Try to invest in the fastest drives that you can to future proof the system and avoid future performance issues if you have to scale for more users.
- Ensure that you have at least 20-25% free disk space on all partitions/drives
- Defragment all drives on a regular basis to optimise read and write operations
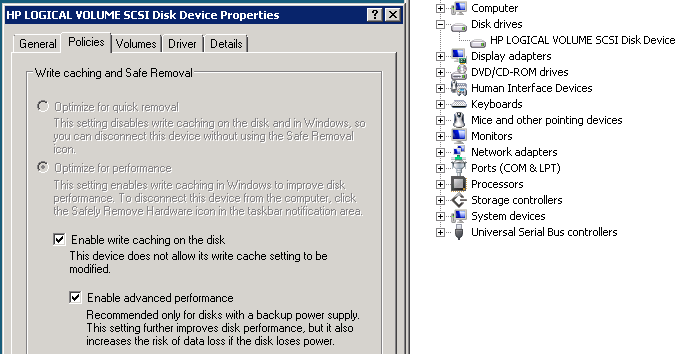
- A cheap solution for improving disk performance may be to turn on the Hard Disk Cache using “Device Manager” or in the event that you are using a RAID controller without a battery backed Cache module you will need to open the RAID Array Management Software and then enable Disk Cache within the management software as this feature will not be available within “Device Manager” in this instance. Please note that this does have some risks and should be used with caution, you may loose data in the event of a sudden/unexpected loss of power to the system. Consider using this option with a UPS and redundant power supplies to reduce the risk of power loss to the system. As always ensure you have a reliable backup that is carried out at regular intervals.
Example – HP RAID Array Configuration Utility:
Example – Windows Device Manager:


